Hello, fellow yarn lovers! Are you ready to add a touch of whimsical charm to your crafting repertoire? Today, we’re diving into the delightful world of the Puff Flower crochet pattern, and trust me, it’s one you absolutely need to learn!
Imagine a cluster of soft, voluminous petals unfurling like a tiny bloom, ready to bring joy and texture to any project. These little puff flowers are simply adorable! They’re perfect for beginners looking to master a new, satisfying stitch, amazing for whipping up thoughtful handmade gifts, and fantastic for adding a pop of handcrafted beauty to your home decor. Get ready to learn a fun and versatile technique that will have you crocheting a garden of these sweet flowers in no time!

The Puff Flower Crochet Pattern You Absolutely Need To Learn
There’s a certain magic to creating something beautiful and tactile with just a hook and some yarn, and for many crocheters, the puff flower holds a special place in their hearts. These delightful little blossoms add a burst of color and texture to any project, making them incredibly versatile and undeniably charming. Whether you’re a seasoned crocheter looking to expand your repertoire or a curious beginner eager to dive into the world of textured stitches, this puff flower pattern is a must-have in your crafting toolkit. Let’s explore why, and how you can master it!
Why the Puff Flower is a Crocheter’s Dream
The puff flower, in its various forms, is celebrated for its unique three-dimensional appeal. Unlike flat stitches, the puff stitch creates a delightful raised texture that mimics the softness and fullness of a flower petal. This tactile quality is not only visually appealing but also adds a wonderful richness to projects. Furthermore, puff flowers are incredibly adaptable. They can be made in a myriad of colors, sizes, and arrangements, allowing for endless creative possibilities. Mastering this stitch opens doors to a whole new world of embellishment and standalone decorative pieces.
Yarn and Hook Recommendations: Setting the Stage for Success
Choosing the right materials can make a world of difference in how your puff flowers turn out. For this pattern, versatility is key.
Yarn: You can achieve beautiful results with a wide range of yarns.
Worsted Weight Cotton: This is a fantastic choice for beginners and for creating sturdy, well-defined puff flowers. Cotton yarn has a lovely drape and holds its shape well, making it ideal for projects that need to withstand a bit of wear and tear. It also lends itself beautifully to vibrant colors.
DK or Light Worsted Weight Acrylic: Acrylic yarns are budget-friendly, come in an incredible spectrum of colors, and are generally easy to work with. They are a great option for practicing and for projects where washability is a priority.
Fingering or Sock Weight Yarn: For more delicate and intricate puff flowers, consider using lighter weight yarns. These are perfect for creating tiny embellishments for garments, jewelry, or even delicate doilies.
Consider: For the best definition of the puff stitch, yarns with a bit of twist are generally preferred. Avoid very fuzzy or heavily textured yarns when starting out, as they can make it harder to see and execute the stitches clearly.
Hook: Your hook size will depend on the yarn you choose and the fabric density you desire.
General Recommendation: For worsted weight yarn, a hook size of H/8 (5.0 mm) or I/9 (5.5 mm) is a good starting point.
For Lighter Yarns: You’ll want to size down accordingly. For DK weight, try a G/6 (4.0 mm) or H/8 (5.0 mm). For fingering weight, a D/3 (3.25 mm) or E/4 (3.5 mm) would be appropriate.
Tip: Always check your yarn label for the manufacturer’s recommended hook size, but don’t be afraid to experiment! Sometimes a slightly larger or smaller hook can create the perfect tension and definition for your puff stitches.
Stitch Techniques You’ll Master
The puff flower pattern primarily relies on a few fundamental crochet techniques, with the star of the show being the puff stitch itself.
The Puff Stitch (or Popcorn Stitch, Bobble Stitch – variations exist!): This is where the magic happens! While there are slight variations in how puff stitches are worked, the core concept involves creating a cluster of stitches that are then closed together. A common method involves:
1. Yarning over.
2. Inserting your hook into the designated stitch.
3. Pulling up a loop (you’ll now have 3 loops on your hook).
4. Repeating steps 1-3 several times (e.g., 4 times for a standard puff stitch) until you have a significant number of loops on your hook.
5. Yarning over and pulling through all loops on the hook, leaving one loop.
6. Chaining one to secure the puff stitch.
Don’t worry if it feels a bit fiddly at first! Practice is key to getting the right tension and a neat, rounded puff.
Single Crochet (sc): You’ll likely use single crochet to create the foundation rounds of your flower or to connect your puff stitches. It’s a basic, sturdy stitch that forms a dense fabric.
Slip Stitch (sl st): This stitch is used for joining rounds or for moving your yarn to a new position without adding height.
Chain (ch): The chain stitch is the foundation of most crochet work and is used here to create spaces and build structure.
Tips for Beginners: Navigating Your First Puff Flowers
Embarking on a new stitch can feel daunting, but with a few insider tips, you’ll be creating beautiful puff flowers in no time!
Start Simple: Begin with a worsted weight yarn and a larger hook. This will make it easier to see your stitches and for your fingers to manipulate the yarn.
Count Your Loops: When working the puff stitch, pay close attention to how many loops you have on your hook before you yarn over to pull through. Consistency is key for uniform puffs.
Practice the Puff: Dedicate some time to just practicing the puff stitch on its own. Crochet a few rows of puff stitches directly into your foundation chain. This will help you get a feel for the motion and the desired tension.
Don’t Pull Too Tight: While you want your puffs to be defined, pulling your stitches too tightly can make it difficult to insert your hook into subsequent stitches, especially when working around the base of a puff. Aim for a relaxed but firm tension.
Watch Videos: There are countless excellent video tutorials available online for the puff stitch. Seeing it demonstrated can be incredibly helpful for visual learners. Search for “crochet puff stitch tutorial” and experiment with different instructors until you find one whose style resonates with you.
Embrace Imperfection: Your first few puff flowers might not be perfectly symmetrical, and that’s perfectly okay! Every stitch is a learning opportunity. Focus on the process and enjoy the journey of creation.
How to Customize Your Puff Flowers: Unleash Your Inner Artist
The beauty of the puff flower lies in its adaptability. Here’s how you can make them uniquely yours:
Color Play:
Single Color Blooms: A single, vibrant color can make a bold statement.
Two-Tone Petals: Change color at the beginning of the last pull-through of a puff stitch to create a subtle two-tone effect. Or, you can work alternating puff stitches in different colors within the same round.
Gradient Effect: Use yarns that are naturally variegated or transition between colors as you work.
Center Contrast: Change to a contrasting color for the center of the flower for a pop of visual interest.
Size Matters:
Larger Flowers: Increase the number of stitches worked into each puff, or add more rounds of puff stitches. You can also use a larger hook and thicker yarn.
Smaller Flowers: Decrease the number of stitches worked into each puff, or use a smaller hook and finer yarn.
Petal Variations:
Number of Puffs: The typical puff flower has 5 or 6 puff stitches around a center. Experiment with more or fewer for different looks.
Spacing: Adjust the number of single crochets or chain stitches between puff stitches to change the spacing and overall appearance of the petals.
Leafy Accents: Add small crochet leaves or other decorative elements around the base of your flowers.
Care Instructions for Your Finished Pieces
Once your puff flowers are adorning your projects, you’ll want to keep them looking their best.
Washing:
Check Yarn Label: Always refer to the care instructions on your yarn label.
Hand Wash Recommended: For most delicate crochet items or those made with cotton or natural fibers, hand washing in cool or lukewarm water with a mild detergent is the safest option.
Machine Washable (with caution): If using acrylic yarn and the yarn label permits, you can machine wash on a gentle cycle in a lingerie bag to protect the stitches.
Avoid Hot Water: Hot water can cause fibers to shrink or become distorted.
Drying:
Lay Flat to Dry: This is the golden rule for most crochet items. Gently squeeze out excess water (don’t wring!) and reshape the piece. Lay it flat on a clean towel or a mesh drying rack, away from direct sunlight or heat.
Avoid Hanging: Hanging wet crochet items can cause them to stretch out of shape due to the weight of the water.
Storage: Store your finished pieces in a breathable bag or container to protect them from dust and moths. Avoid plastic bags, which can trap moisture.
Project Ideas: Where Will Your Puff Flowers Bloom?
The possibilities for puff flowers are truly endless. Their decorative appeal makes them perfect for embellishing existing items or for creating standalone treasures.
Appliques:
Garments: Sew or crochet them onto sweaters, cardigans, hats, or even baby blankets.
Bags and Purses: Add a charming touch to tote bags, clutch purses, or drawstring bags.
Home Decor: Embellish cushion covers, placemats, or curtains.
Standalone Projects:
Coasters: Create a set of beautiful, textured coasters.
Garlands and Buntings: String them together for festive decorations.
Brooches and Pins: Attach a safety pin to the back for wearable art.
Hair Accessories: Glue them onto hair clips, headbands, or scrunchies.
Dreamcatchers: Incorporate them into the design of a dreamcatcher.
Wreaths: Decorate a plain wreath form with a delightful array of puff flowers.
The puff flower crochet pattern is more than just a stitch; it’s an invitation to infuse your creations with texture, color, and a touch of handmade charm. So grab your hook, choose your yarn, and get ready to blossom with this delightful and rewarding technique!
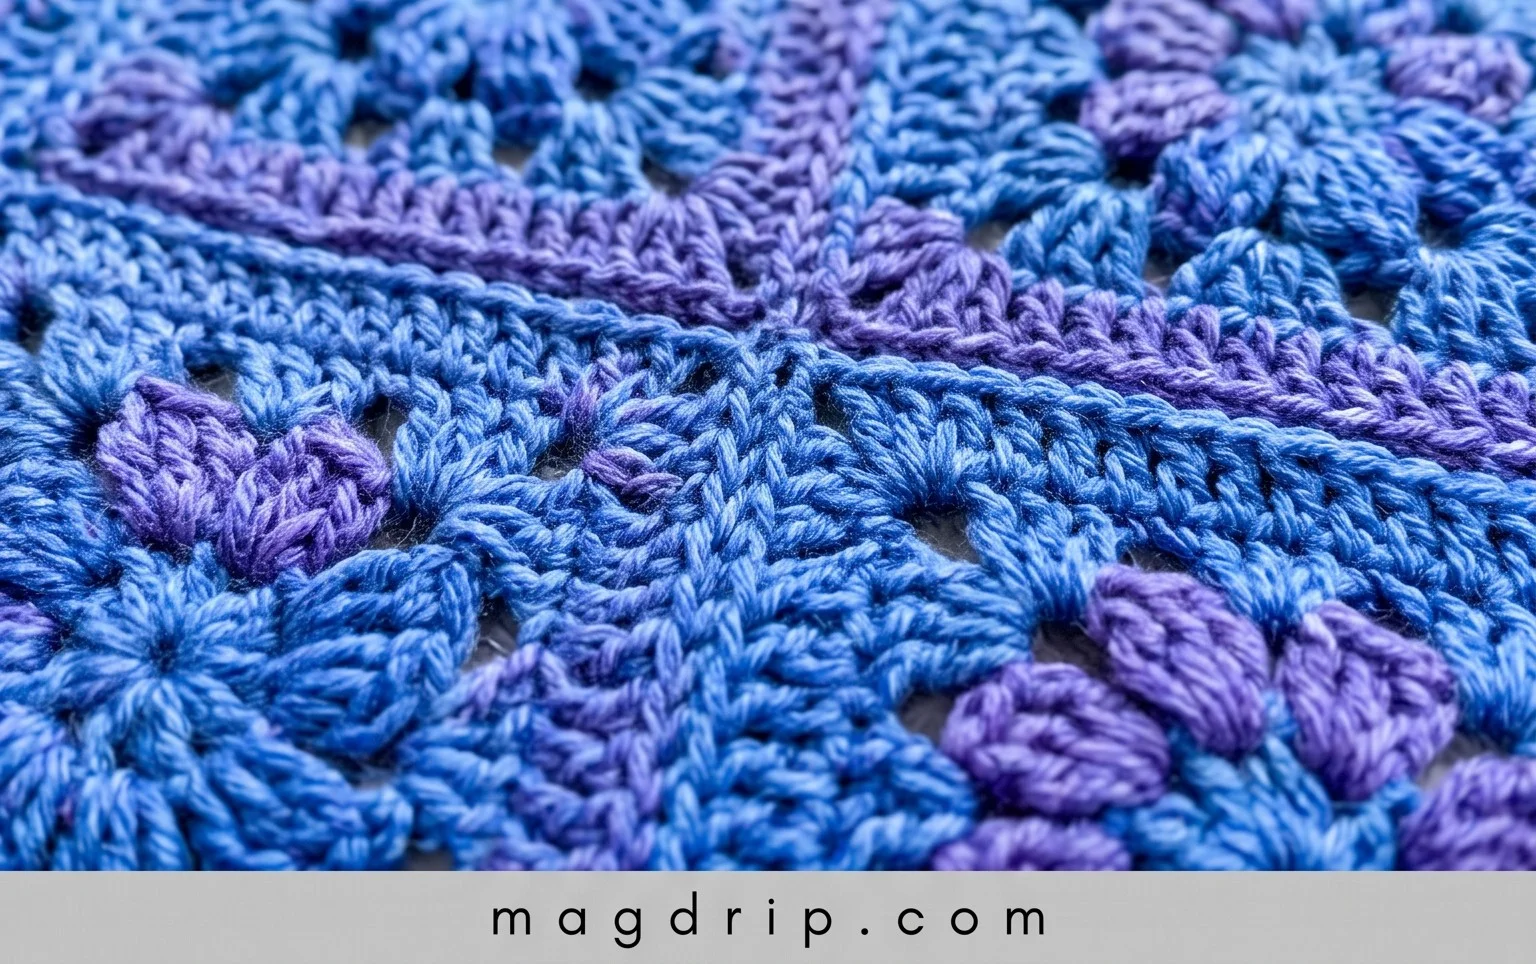
There you have it! The lovely puff flower crochet pattern, ready for you to bring to life. We truly hope you’re feeling inspired to grab your hook and yarn and give this delightful design a try. It’s such a satisfying project, and the versatility of the puff stitch makes it perfect for countless creations.
Once your beautiful puff flowers are blooming, don’t be shy! We’d absolutely love to see your finished projects. Share them on social media using the hashtag #[YourBrandHashtag] – we can’t wait to be inspired by your creativity! Feel free to experiment with different yarn weights, colors, and even combine them with other stitches for unique embellishments. And remember, this is just the beginning of your crochet journey. Explore our other patterns for more inspiration and happy hooking!